
 ES
ES EN
EN
It is very important to carefully follow the users throughout their journey, and target them with personalized content. Successfully doing so can exponentially increase your chances of them engaging with your content, product, or service. But, it also provides a solid reason for the user to constantly return to your website.
So, target one individual at a time? Why not?! If that is what it takes, then with the Notix API you get the chance to send push notifications to one user. The moment he performs any event. Basically, the moment you see that user making a move, you can target him with a triggered Push Notifications.
This increases the user’s perception of your website, and provides a more human-like connection. You’ll make users trust you more. Hence they’ll be more likely to engage with your website. And if you’re also going for monetization, they might be more trustworthy to access any ads that your site might feature.
Ok, this all sounds great. But now you’re probably wondering: “What if several users take the same action? Do I need to create a trigger for each individually?”
Of course not. We took care of everything. Using our API integration together with a simple retargeting Pixel, you can automate the process. Thus setting a trigger for one, or several users simultaneously.
The process behind triggered Push Notifications
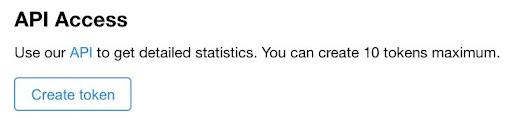
In order to deliver this spot-on technology, we had to implement an API circuit. So, here’s more about what API integration is and how it works.
First of all, API is an application programming interface. A standard of connection between devices or programs. In simple words, it allows you to access a service provided by one program, from within another. This way, you can communicate with Notix, and ‘trigger’ our core system to send a Push Notification.
But, with the Notix API you can do much more than just that. You can also set various trigger notifications.
So, exactly what we were saying above. Target one, more users, or entire audiences. Or, maybe you want to also segment users, and take them down the marketing funnel.

How does the Triggered Push Notification Works
We said that triggered Push Notifications are event based messages. But working with Notix, only you can know when the user is doing a certain event (yes, we don’t snoop in on you, or your users privacy).
So, when you notice that one (or several) of your user(s) make a certain action, you can trigger the notification.
In other words, send a signal to the Notix API, with the details of the action, and the push notification that must be sent out. And based on the type of trigger that must be set, there are various levels of difficulty.
Types of triggered alerts you can send with Notix
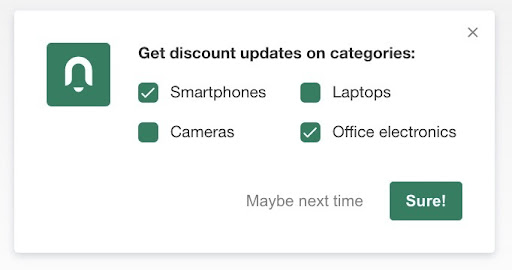
Categories Checkbox Prompt
When the users subscribe to receive your push notification, you can also set a checkbox prompt to appear as your subscription window. From it, they can decide what type of content they are interested in receiving push notifications about.
Once they choose the topics they’re interested in, you can automatically separate various users into audiences. Straight from the moment they subscribe.
When you’re setting up the checkbox prompt, you can come up with the specific options you give your users. Think of the type of audiences that you’re interested in. The ones that are more characteristic for your website. Some example could be:
- News
- Lifestyle
- Games
- New content releases
- Offers and promotions
- Account information, so on, and so forth
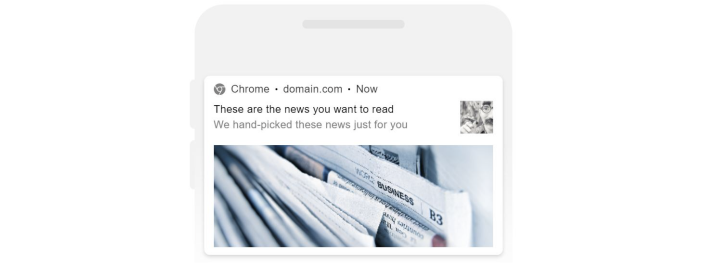
Here’s a practical example: Your subscriber goes to a page mentioning a specific series. If you know the user wants updates about this type of product (movies/series), this is the trigger you can set from your side (website or server).
Synched IDs Notification
With Notix you can target one user at a time by ID, when matching users from 3rd party push services. This way, if you already have background data on these users, you can easily set a triggered push notification for them, once migrated.
For example: If you have an online shop, you can follow in your software their IDs (let’s say from 1 to 100). When you launch the push notification prompt, only 30 of them might subscribe.
With the user sync you can identify every individual from your push subscribers as the user from your own system. Based on this data synchronization you can then build your individual messages around it.
This type of triggered push can also be defined based on the users’ actions (login, click, purchase, etc.), but even in its absence (no login, no click, no purchase; you get the point).
Individual IDs Push Message
You can target users when they are subscribed to your push notification on several websites you manage.
Time-bound Push Notification
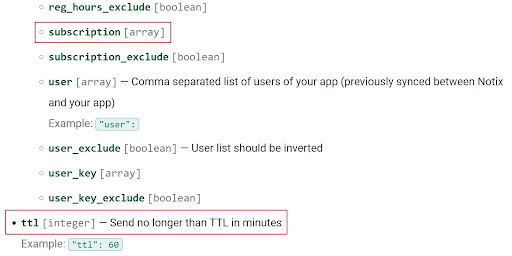
You can define a push notification to be triggered based on the time during which the user is making an action (or their absence, as in the case from above). All you need to do is define:
- the starting point, based on Subscription period (from date – to date)
- and its validity, or TTL (Time To Live)
This type of trigger doesn’t need a very advanced level of coding (just average knowledge), and can be easily defined from within the API Push Notification delivery code.
Here are the instructions to send Push Notifications through API
Action based Alert
You can set these kinds of triggers using our API and the retargeting pixel. And you’ll still be able to choose between at least two types:
- Event based – click, impression, other actions (abandoned cart, logged in, no return, etc.)
- Trigger chain – one action that leads to another, and so on, moving the user from one audience to another (impression, click, purchase, retargeting, etc), and down the funnel
The retargeting pixel is primarily a tool which helps you separate users in audiences (just like an audience segmentation tool). In order to make it work, you need to add a pixel on the page from which you want to collect your audiences.
Here’s the full guide on how you can work with the Retargeting Pixel
The API can be used to trigger push notification delivery, based on the action (audience collected by the retargeting pixel) that characterizes your users.
Who can send triggered push notifications with Notix?
Obviously, based on the push notification trigger that you want to set you will require more, or less advanced coding skills. With some, no coding experience is required – WordPress Plugin.
For some of the first triggers from above – category checkbox, individual, and time-bound triggers – you might be able to do everything by yourself, or at max by getting in contact with our developers.
While for the more advanced – action-based trigger, you’re better off by working with your own team of developers.
Targeting settings for triggered messages
When it comes to customizing your triggered Push Notifications, you can also use targeting settings. Even when you send these messages through API integration. Keep in mind that for these settings, you might have to either have your own team of developers, or get some help.
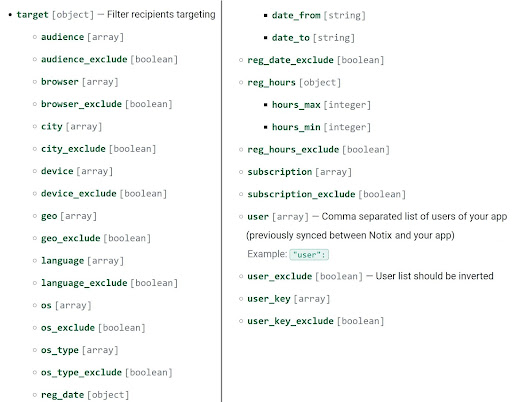
This feature allows you to finally set up more loose or narrow targeting objectives, based on your preferences. Doing so, you increase your chances to reach only the most interested audiences.
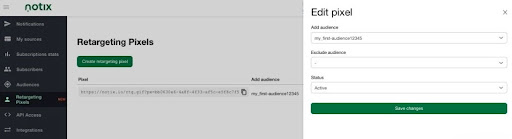
How to use Notix’s targeting settings?
In the image above you can also see how you can include or exclude collected audiences, straight from the API setup (the first option from the list).
For example: If a user in an online store has filled a basket, he can be added to the “almost bought” audience. When he buys – you can remove him from the audience “almost bought” and add to “bought”.
Thanks to audiences, it will be possible to send a message to all the subscribers from the audience of “almost bought”.
The result of sending triggered push notifications
As you might’ve understood by now, if you set up everything right, you can successfully engage with your users. And even return them on the website when they’ve been gone for a shorter or longer time.
All you need to do is carefully follow the steps listed above, and know when it’s time to ask for specialized help.
If you don’t have the right experience to handle everything by yourself, start by checking out Blog and Help Center. They contain tons of useful information, even more technical ones.
And if those don’t help, contact us. We’ll gladly help, or get our pro developers to do it.