
 PT
PT ES
ES
You asked — we did! Here is the ultimate Notix guide for WordPress website owners. We will show you how to set a Notix WordPress plugin step-by-step, so just do as we do and that’s it. In short, you will need to play around with the settings in your WordPress dashboard and also your Notix account.
A little spoiler: it’s super easy and won’t take much time, so here we go!
Step 1: Registration at Notix
To start, you need to register a Notix account — unless you already have one, of course. The signup process is easy: just follow this link and fill out a short form. If you have any questions or issues with registration, check out our Help Center.
Ready? Don’t rush to leave: you need to prepare some more things before you get to the Plugin installation.
Enter your account and do the following steps:
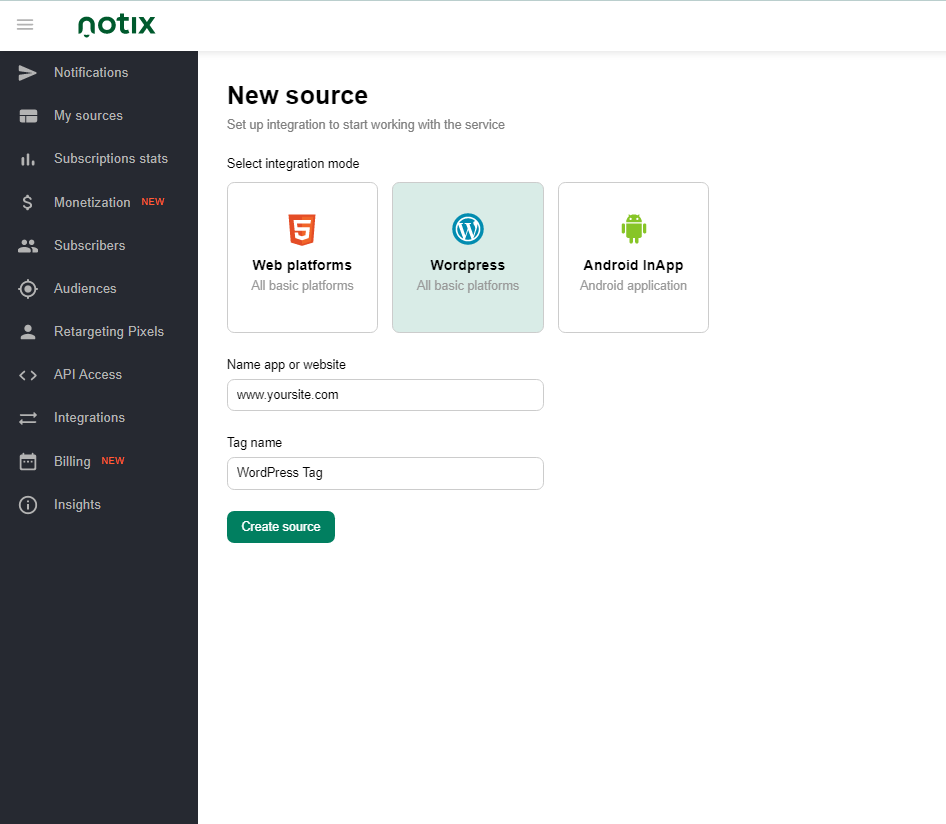
- Add your traffic source. In other words, share a link to your WordPress site. To do it, navigate to Sources — Add Source — WordPress. Add your site domain, create a Tag name (or go with the default one) and press the Create source button:
- Create a tag. Press the Create Tag button, and it will appear automatically, like here:
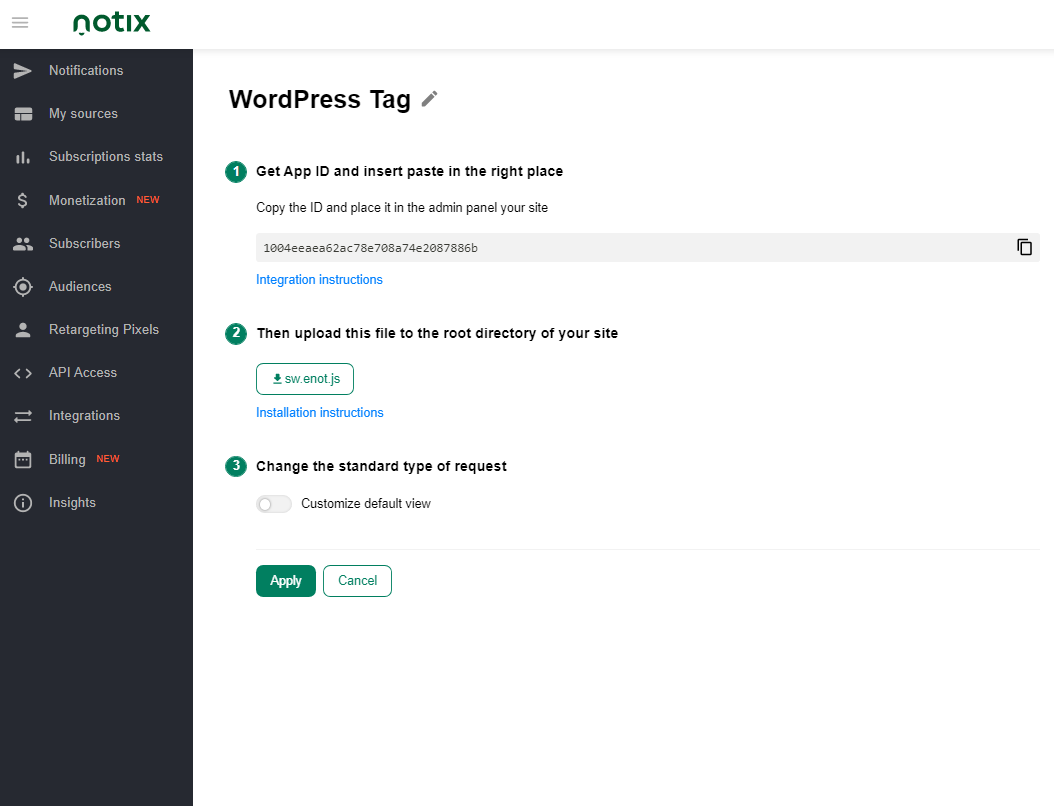
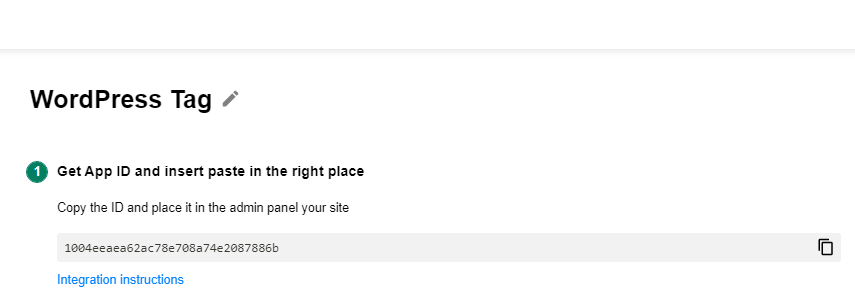
You will need this tag to connect the Notix plugin to your WordPress account, so remember this part 🙂
- Navigate to the API Access tab, press the Create token button, and give your token a name. You will see a token in the feed:
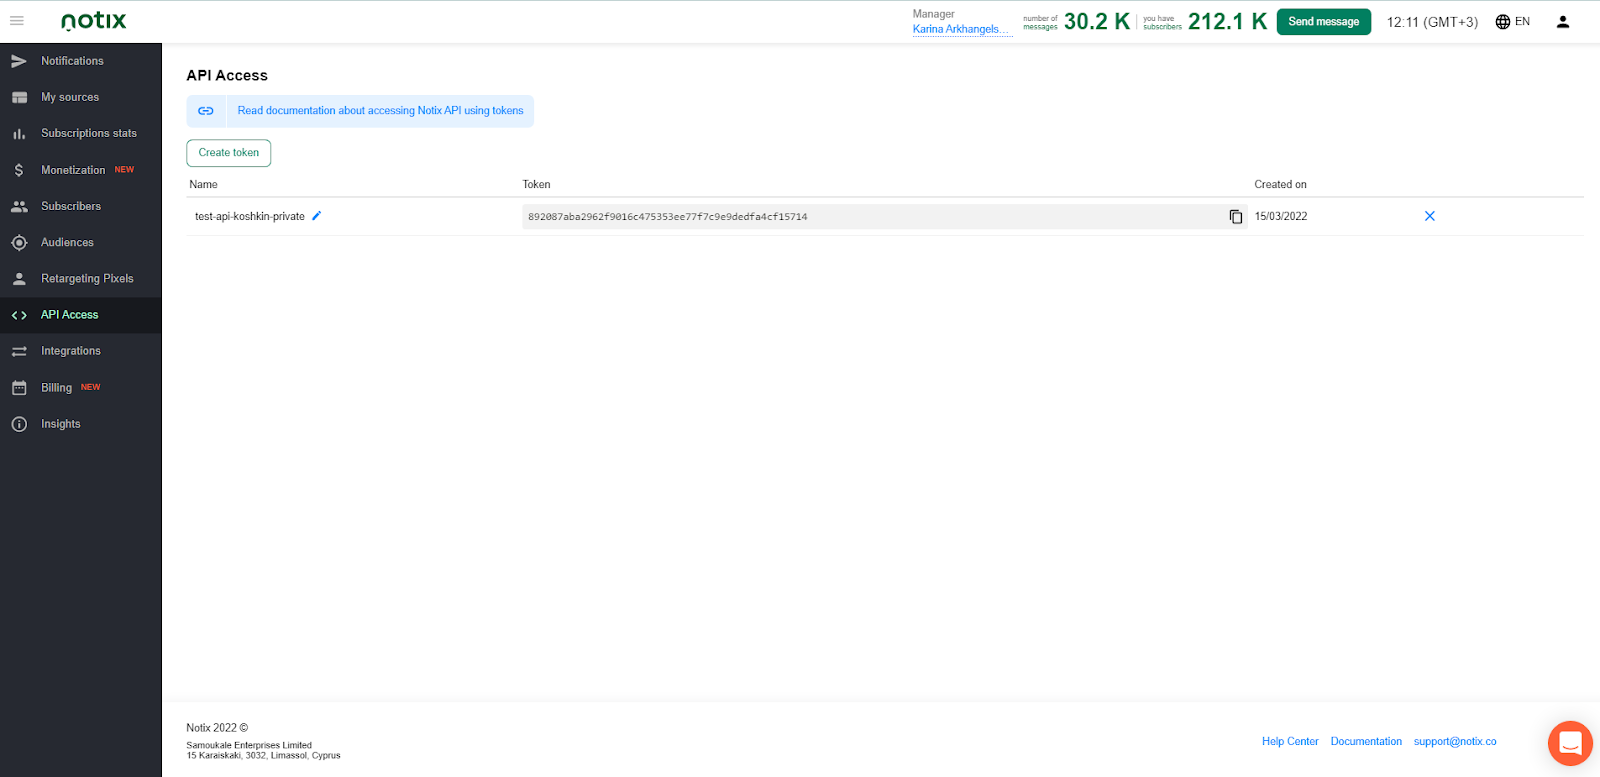
You will need this token to connect Notix plugin to your WordPress account, so remember this part, too 🙂
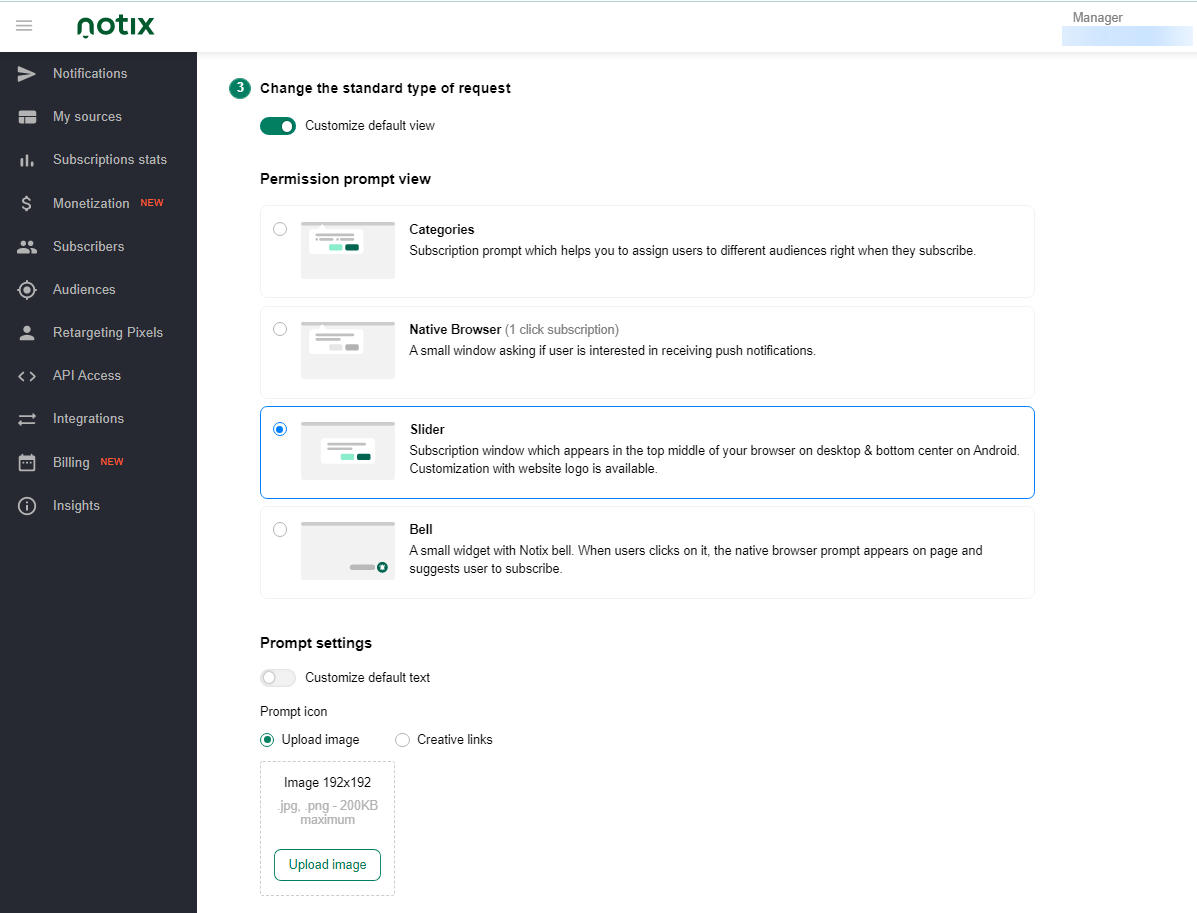
Change the standard type of request (if you wish). When you connect WordPress with the Notix plugin, your users will start receiving receive an opt-in request — a suggestion to subscribe to your alerts. You can customize this opt-in request to fit your brand colors, and tone of voice if you need. You will find the settings here:
Step 2. Setting the plugin
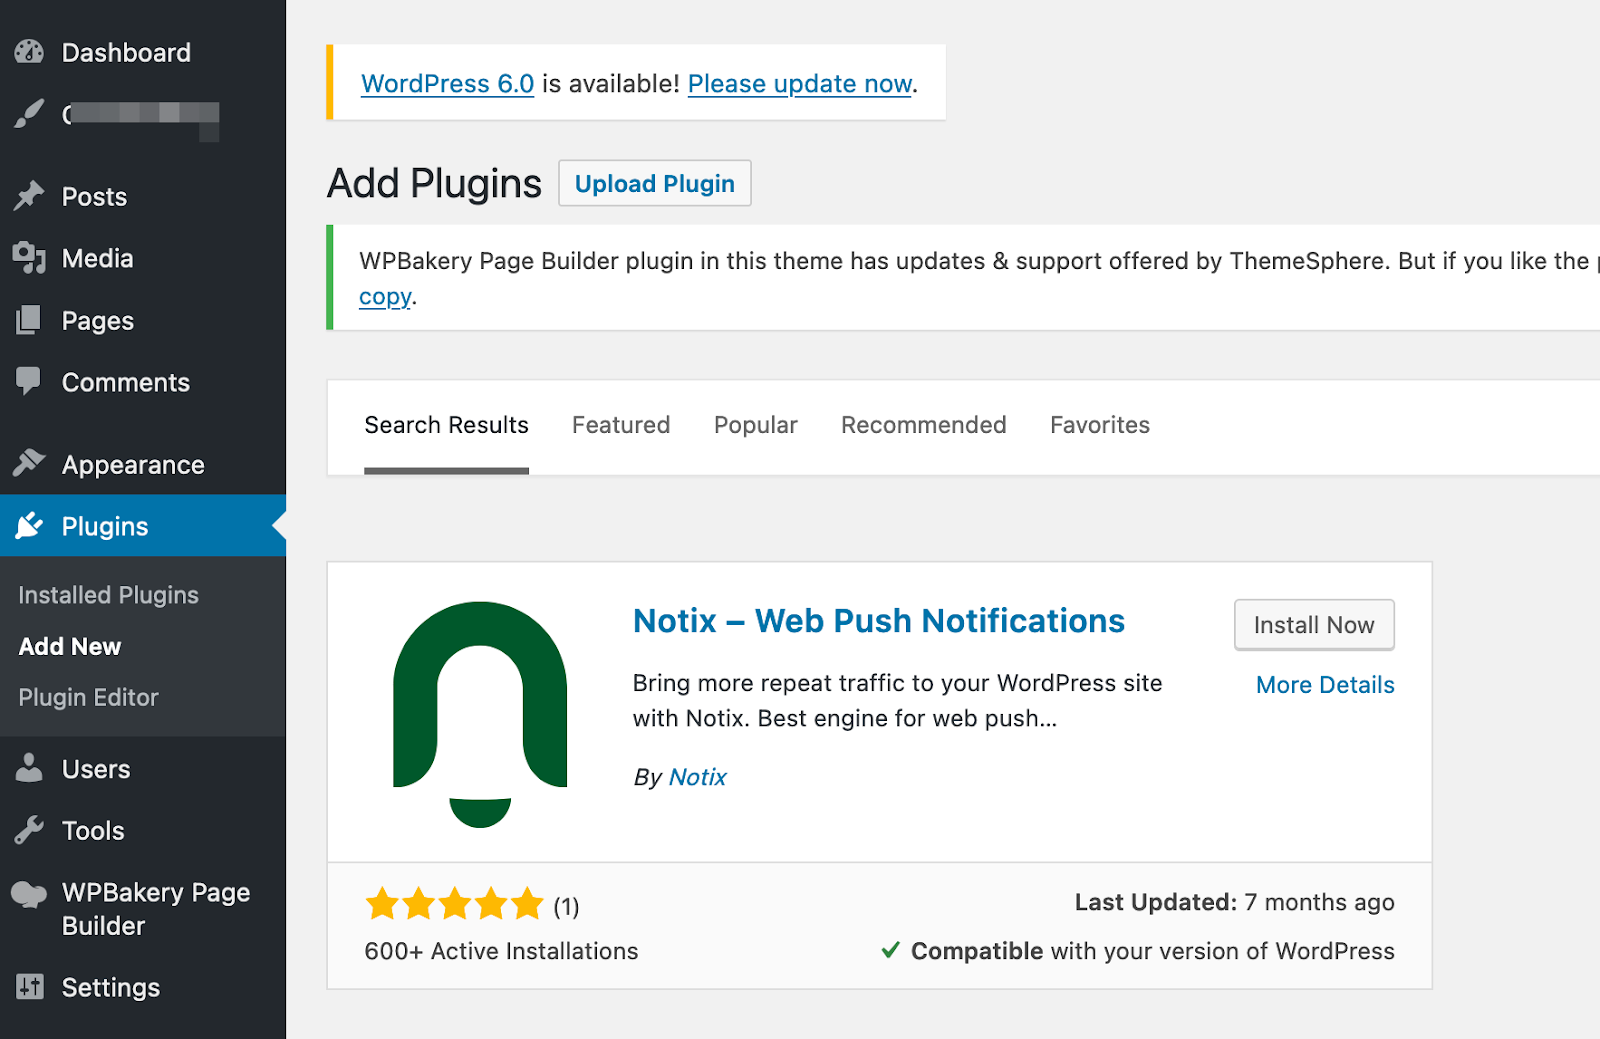
To find the Notix WordPress plugin, enter the administration panel at your WordPress site: here it is in the pic below. You need the Plugin section in the main menu: it is in the panel on the left. Go to Plugins — Add new.
You will see a Plugin library full of various plugins available for your WordPress site. To find the one we need right now, just type ‘Notix’ in the right upper corner, press Enter, and then the Install button.
Or, do it even simpler: here is the link to our Plugin.
Step 3. Activating the plugin
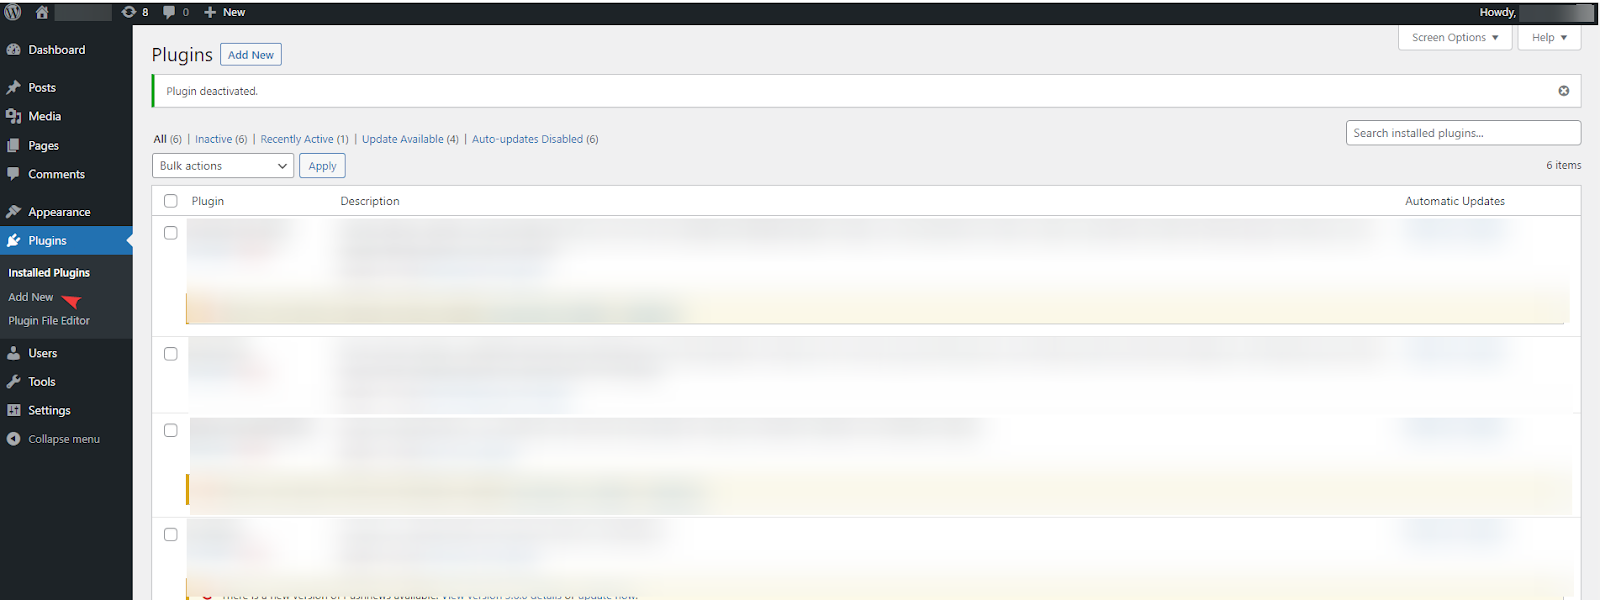
Go back to the Plugins tab. You will find your Notix plugin now in your Plugins feed: press the Activate button.
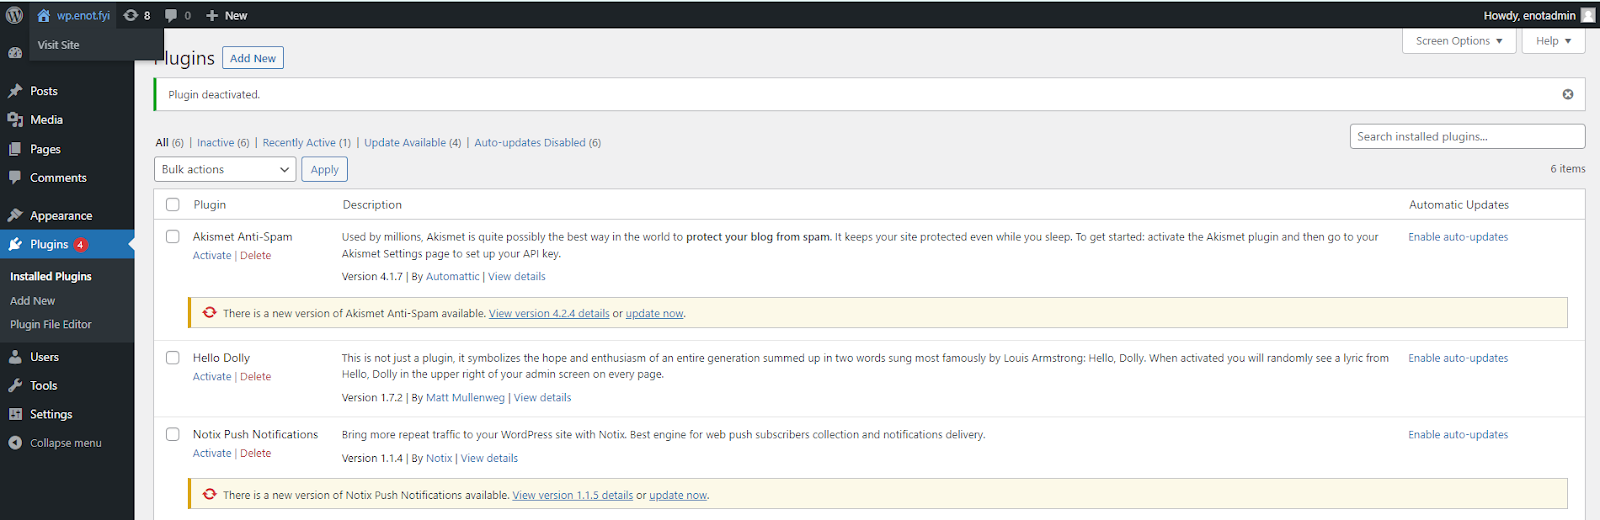
Note! We strongly recommend enabling auto-updates: it will ensure the stable work of your plugin at any time.
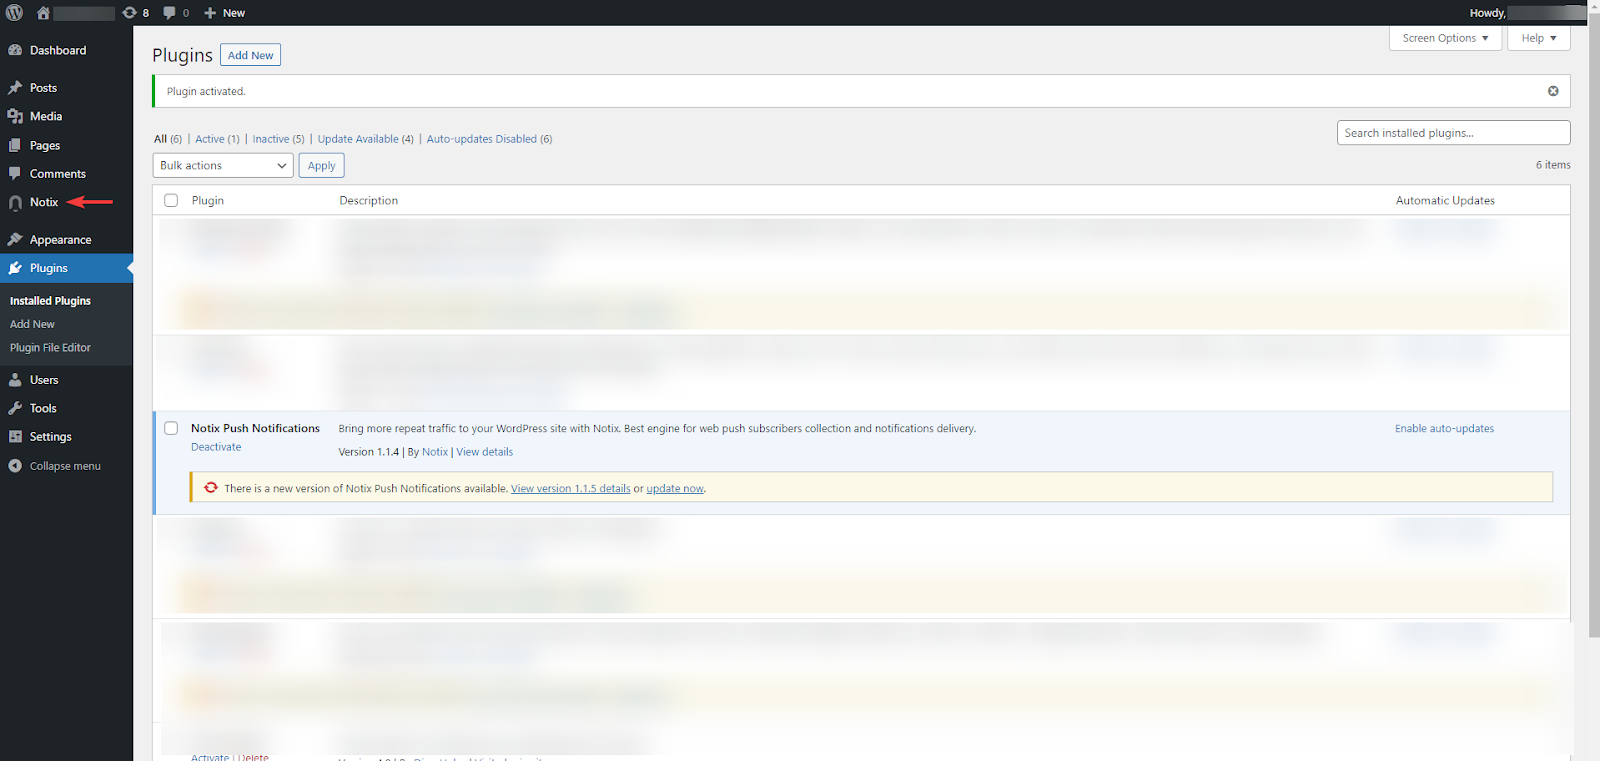
After you do it, a separate Notix tab will appear in your navigation panel: see how it will look like:
Step 4. Connecting the plugin to your Notix account
Now, go straight to the Notix tab we showed you in the previous screenshot. Click the Connect Account button. You will need to add Notix App ID and Notix API token: get back to Step 1 to find them. Leave the third field “Features” empty.
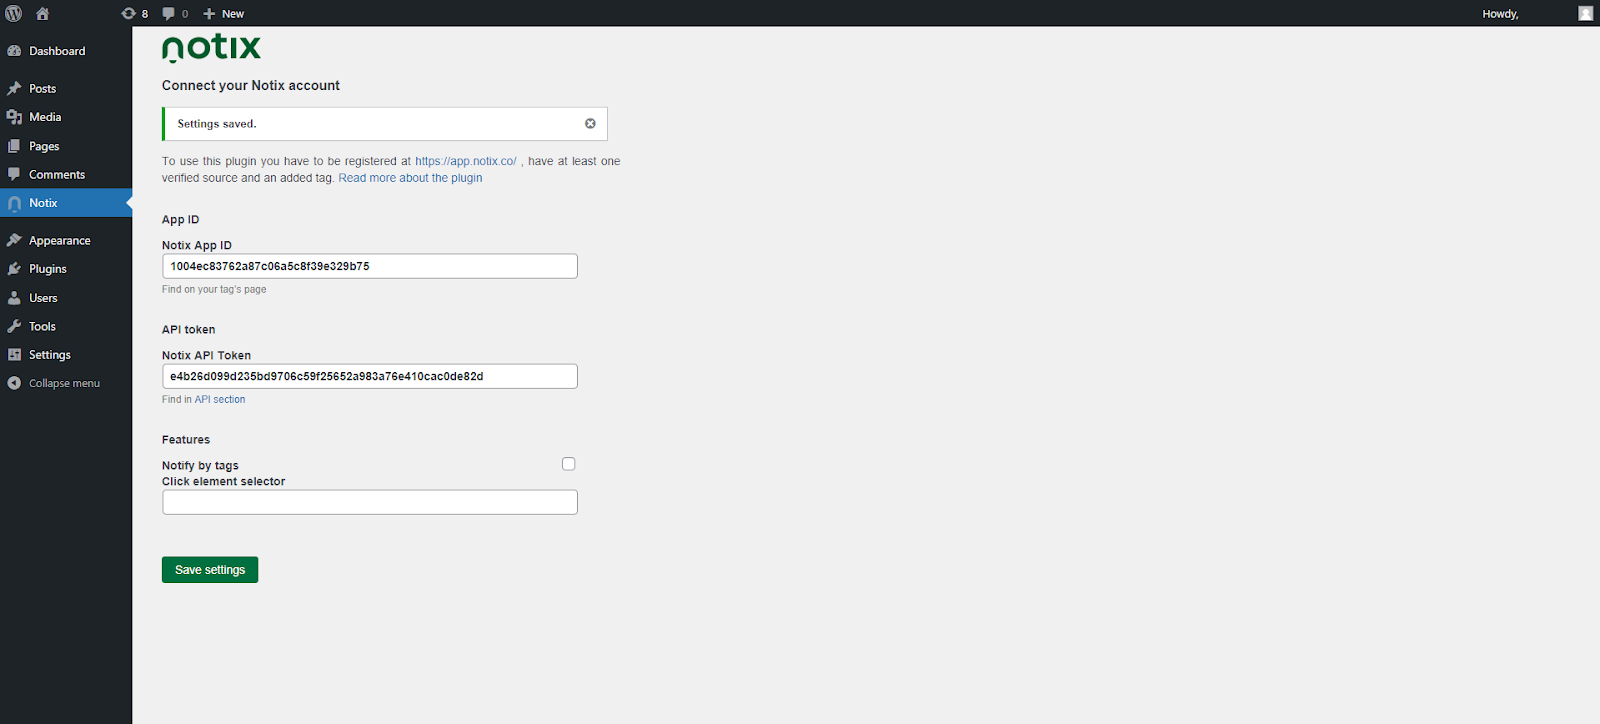
Note! If you’ve just added a source and created an API token, you may need to allow up to 5 minutes before everything is ready for connection.
Press the Change Settings button. If you see the success screen — congratulations, you are ready to send out push notifications to your users!
Step 5. Sending Push Notifications
Now you can send out push notifications to your subscribers, so how to do it? Whatever you publish via your WordPress site, your new content always comes as a new blog post. So, let’s imagine you want to post some exciting news: navigate to New — Post, and create content like you normally do:
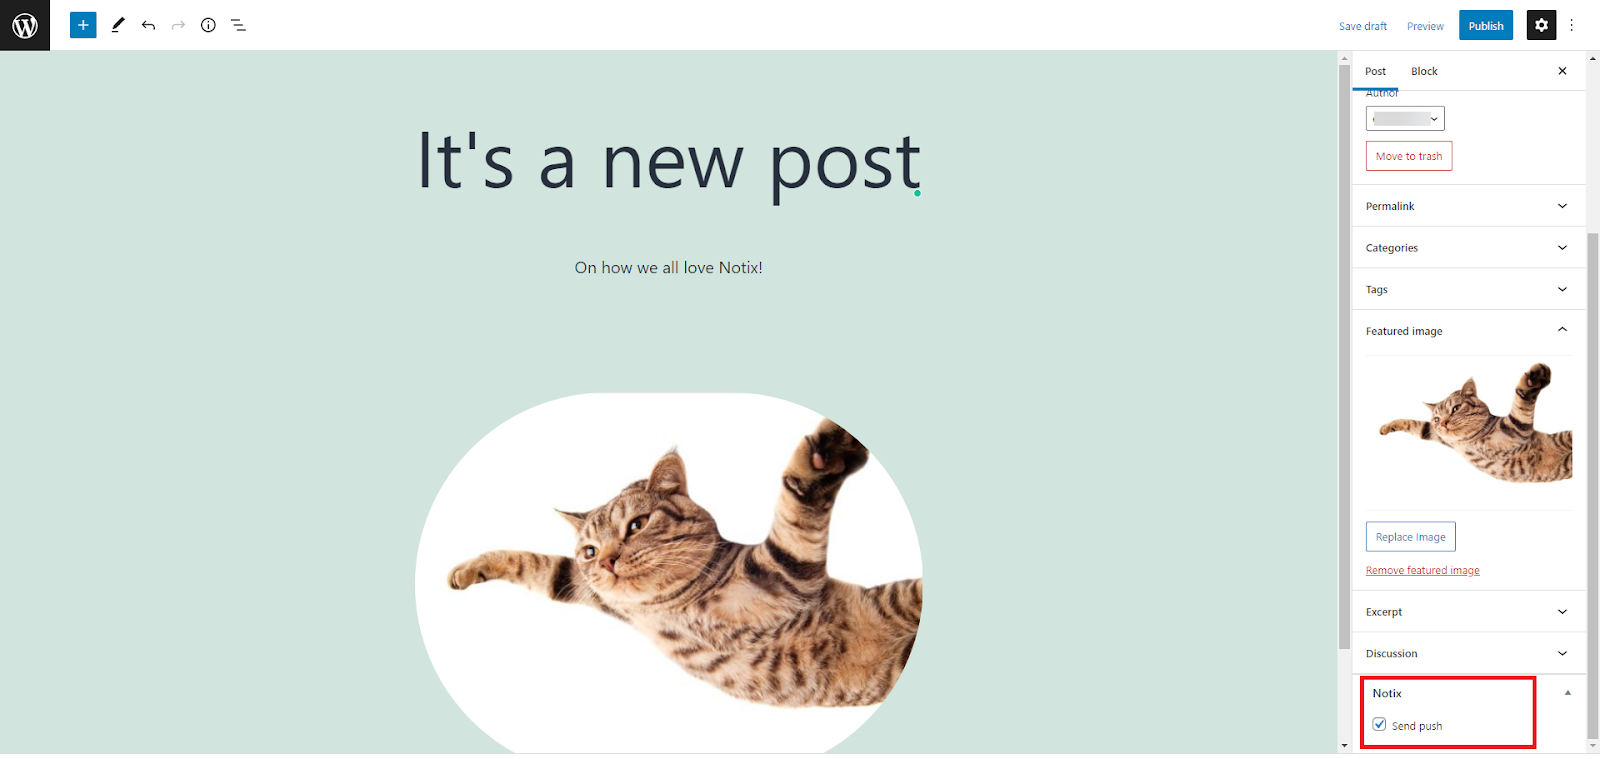
Ready? Find the Notix ‘Send Push’ option in the right lower corner of your page: let the red arrow on the screenshot above help you. Tick the ‘Send Push’ checkbox. Brilliant! Now, as you publish your post, your subscribers will get a notification about it.
To make sure it worked correctly, go to the Notix self-service platform (SSP), navigate to the Notifications section, and see your notification appear in the list:
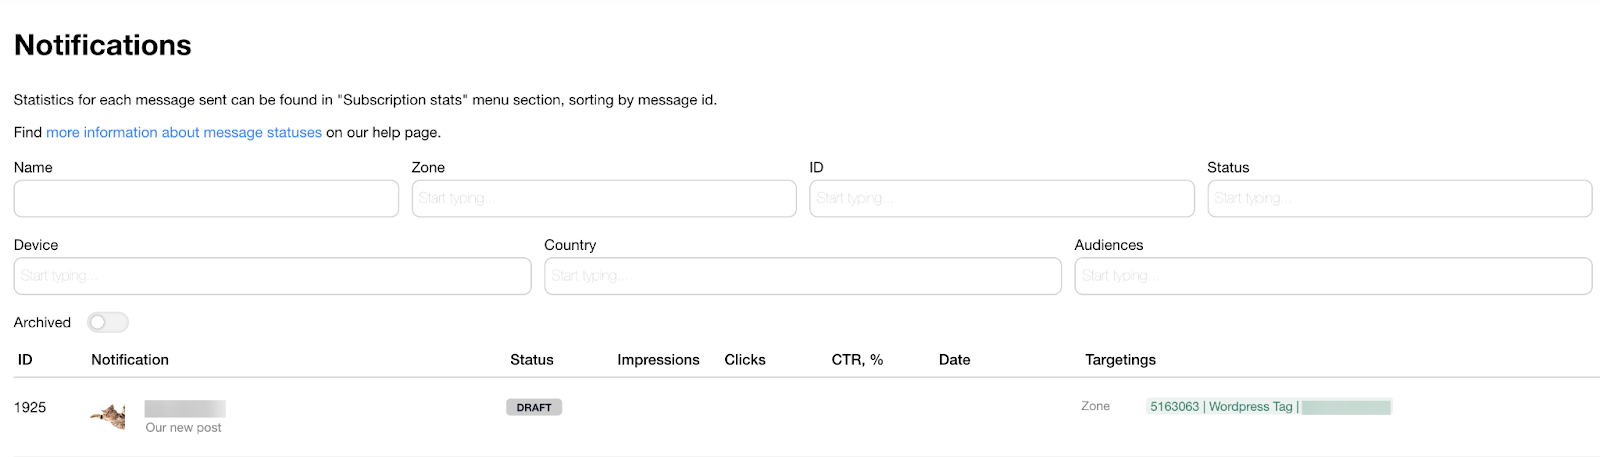
If you don’t have any subscribers, you will see a Draft status, like in the image above. When you collect your subscriber base, the status will change to Sent after publishing the post. It may take some time to send the notifications to all the subscribers. After it’s ready, the status will be changed to Done.
To learn more about message statuses, read our guide — How to analyze message status
By clicking on the notification, you can check how it looks on different devices and platforms:
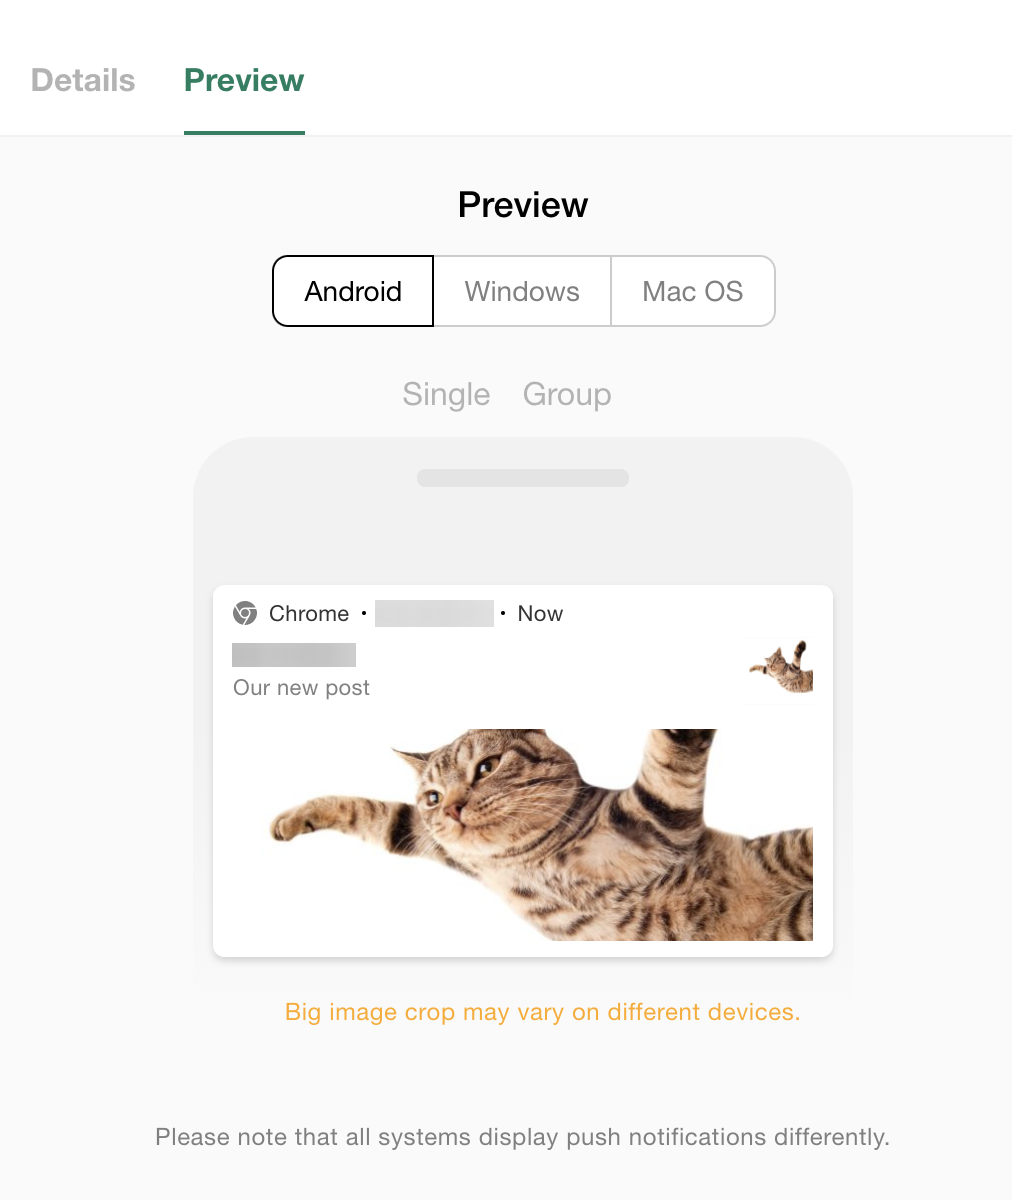
As you can see, the notification is created automatically based on your post. It will have the same headline, description, and featured picture you added for your post. The WordPress plugin doesn’t currently allow you to customize your push notifications, so if you want them to have a different headline, description, and image, use the Notix SSP platform instead.
Important notes
And the bonus part: some small things and trifling issues you can face with your Notix plugin. Use it as your first aid kit if you have problems — but don’t hesitate to contact our customer support, anyway.
Push Notification Preview
When you send a push notification via a WordPress plugin, you can’t check its preview before you publish a post. Again: the notification is created automatically from your post featured image, heading, and description.
If you saw that your push notification doesn’t look like you planned, press the icon next to the notification status. You will see the following page:

Press the Pause button, then go back to your post, edit it, and publish it again. Don’t forget to tick the Notix checkbox when you update your post!
Post Updates
So you need to add something new to your recent post or correct some mistakes. However, you don’t want your subscribers to receive an alert after you update a post. Simply remove a tick from the Notix checkbox when you re-publish a post, and nobody will get a notification on your update.
However, if you need users to get notifications on the post updates (for instance, when you publish a new episode of some series), just keep the Notix checkbox activated when you update the post.
Cache Issues
You decided to remove the Notix plugin, but it still appears in your site code. Or, on the contrary, you installed it but nothing works. Don’t hesitate to contact our support team — you are always welcome. Still, before you do it, try clearing the cache in your browser or your WordPress caching plugin — it may help.
Double Publication
Some WordPress themes create a duplicate of the post. In other words, you publish a post and it appears twice on your site. It implies that your push notification will be sent out twice, too. We managed to solve this issue for most WordPress themes, but there are still some themes left unfixed. If you face such a problem, contact our customer support — we will check what’s wrong and fix it for you.
Still got any questions left?
Contact us at support@notix.co
Want to try Notix to boost your user engagement or find an alternative to your current push notifications service?